


Levelling up - 1: Read the docs
A person who won't read has no advantage over one who can't read. (Mark Twain)


This is the final part of our "PicoLisp for Beginners" series. We have covered the basic concepts, syntax, most important functions and how to collect it all in a script. Congratulations to everyone who followed up to this point!
However, you might have greater plans than just writing the "Hello World" script over and over again. You might need more information about a certain function, or maybe you discover your code has a bug...
In this last section, we will talk about the built-in tools that will help you to tackle these problems. Today we will talk about the following points:
- How to read the documentation
- Use the
docandhelpfunction - How to access the source code using the built-in webbrowser
vip - How to extract and edit the source code using the
vcommand
The documentation
One thing you might surely need is the documentation. There are two ways to access it: via the web browser, or via the REPL.
Access the documentation through the web browser
The documentation can be accessed by the browser on software-lab.de/doc/index.html. As you can see, the browser window is split into three parts:
- Upper Left: navigation menu
- Bottom Left: Function search bar
- Upper right: Function Reference
- Lower right: PicoLisp Reference
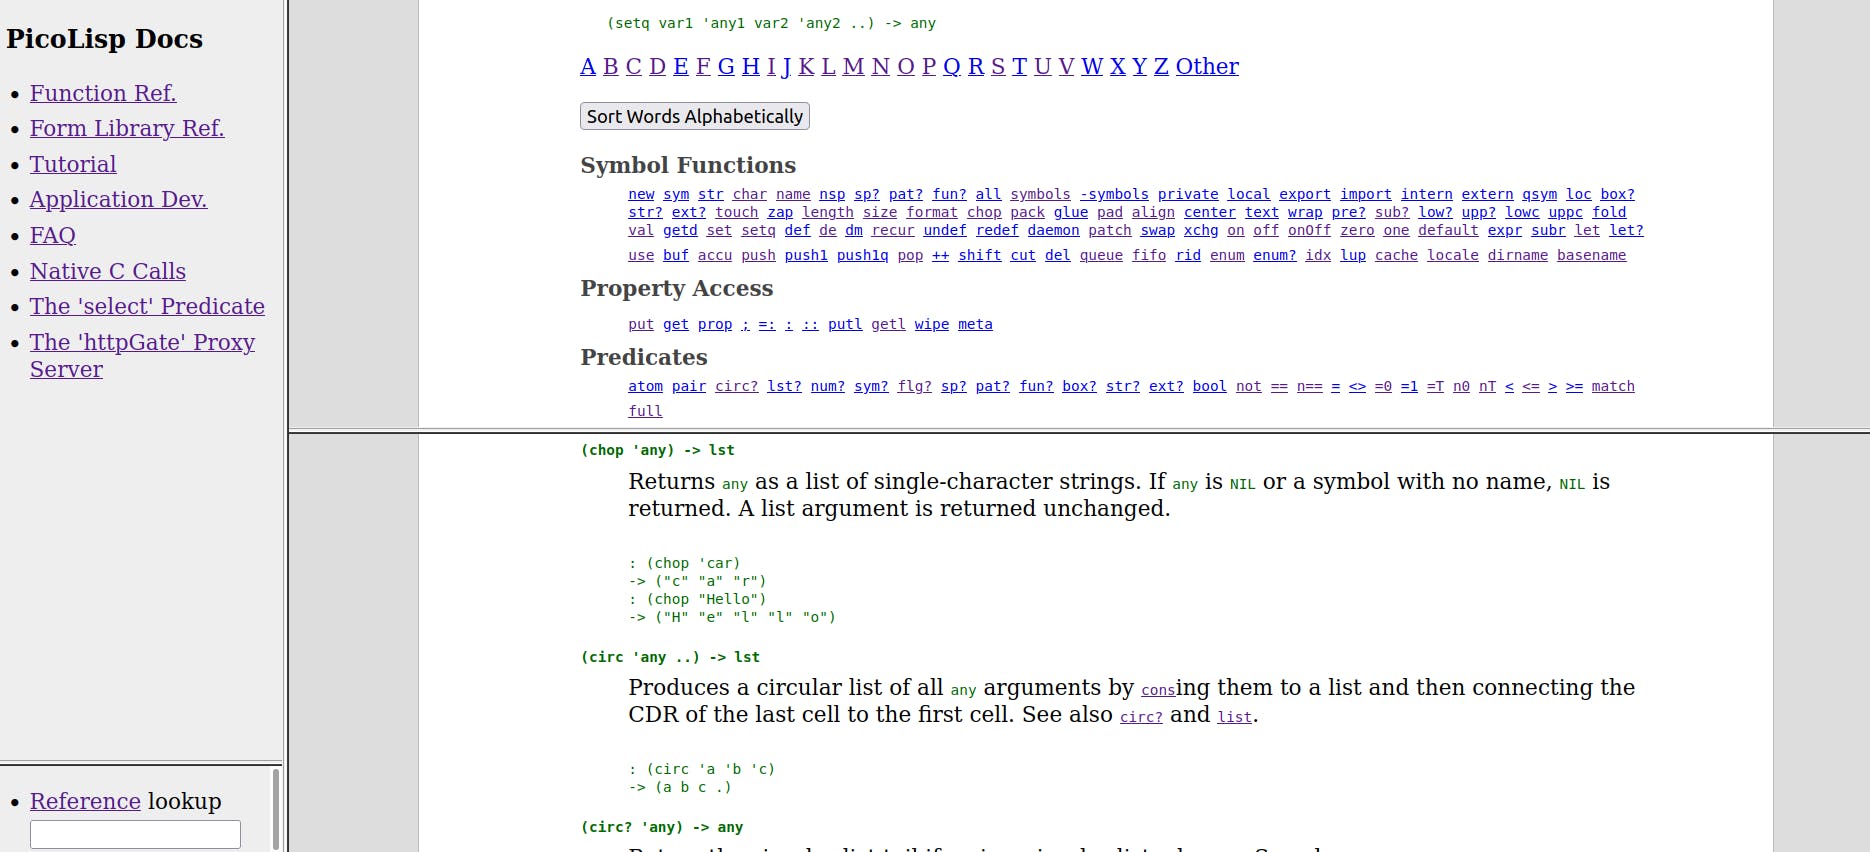
If you are looking for specific functions, it is convenient to keep the upper window at the function overview list that is sorted thematically into categories, such as "Symbol Functions", "Arithmetics" and so on. If you click on the function name, the respective documentation entry will appear in the lower window. Alternatively, you can type the function you are using for in the search bar.
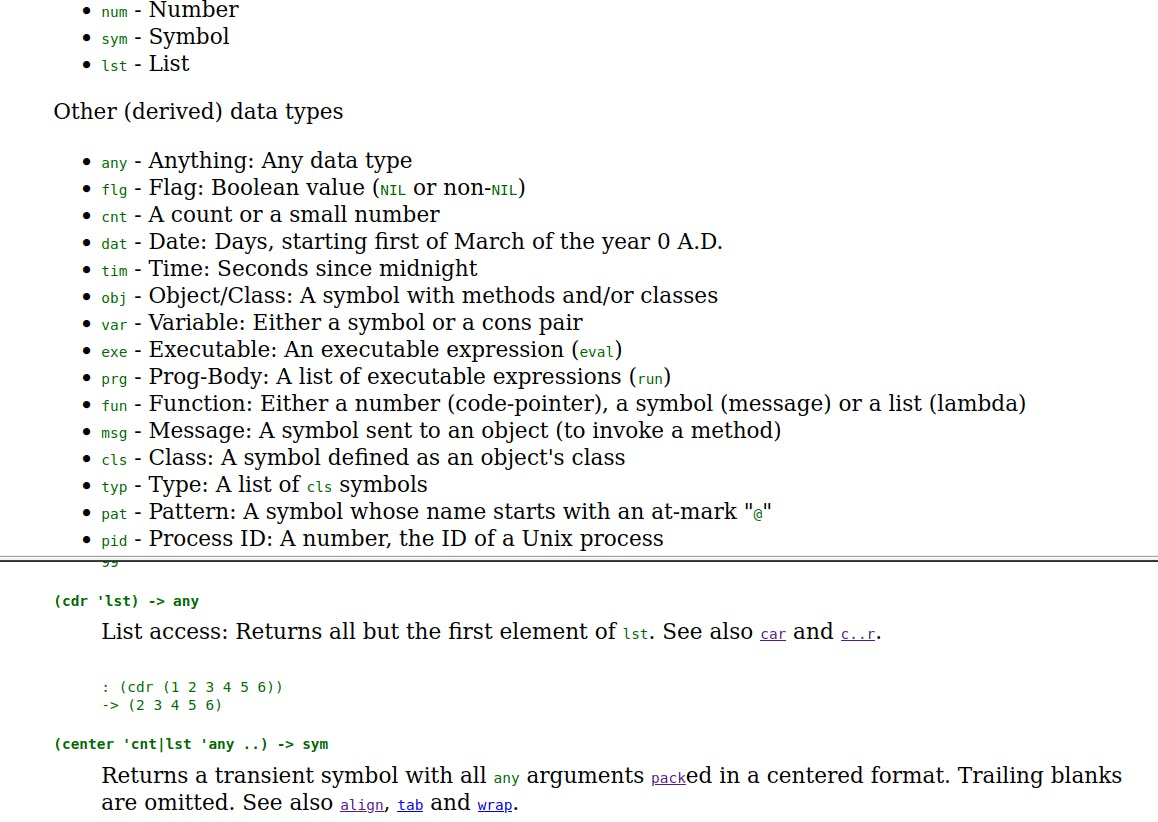
If you are unsure about the meaning of the abbreviations, you can use the upper window to scroll up to the definitions.
Case study 1: The if function
Let's check an easy function to practice reading the documentation: The if function. We basically know what it does, now let's check its description.

The first line specifies the syntax. After that comes a short description in words, followed by a few examples. The examples are pretty straightforward and usually very helpful to understand what the function is doing. In many cases, the examples alone might already give you a good understanding how the function works.
Nevertheless, let's try to understand the syntax description. We will not go too deep here - we will come back to that point in later posts.
-> (if 'any1 any2 . prg) -> any
As first argument,
iftakes'any1. The quote'shows thatany1is evaluated. For example,(> 3 4)evaluates toNIL, and(setq A 3)evaluates to3, which is non-NIL.After that we see two arguments,
any2andprg, that are separated by a.(dot). Depending on the evaluation result ofany1, eitherany2orprgare evaluated.ifreturnsany, which can be any data type (list, number or symbol), depending onany2andprg.
What is the difference between any2 and prg? any2 needs to evaluate down to one data type, while prg can be a list of executable expressions. Therefore, if the condition is followed by several statements, the interpreter "knows" that the first one belongs to the non-NIL path and the rest belongs to the NIL-path.
Example:
(if (> 4 3) (print 1) (print 2) (print 3) (print 4))prints1.(if (> 3 4) (print 1) (print 2) (print 3) (print 4))prints234.
Remark: The structure (A . B) represents a dotted pair, which is is a cell with A in the CAR and Bin the CDR. -> We will come back to that point later, when we discuss how the cell structure of functions looks like in detail. For the moment, let's just record that any2 is a single statement and prg is a list of statements.
Case study 2: The apply function
As second example, let's have a look at the apply function, which applies a function to a list.
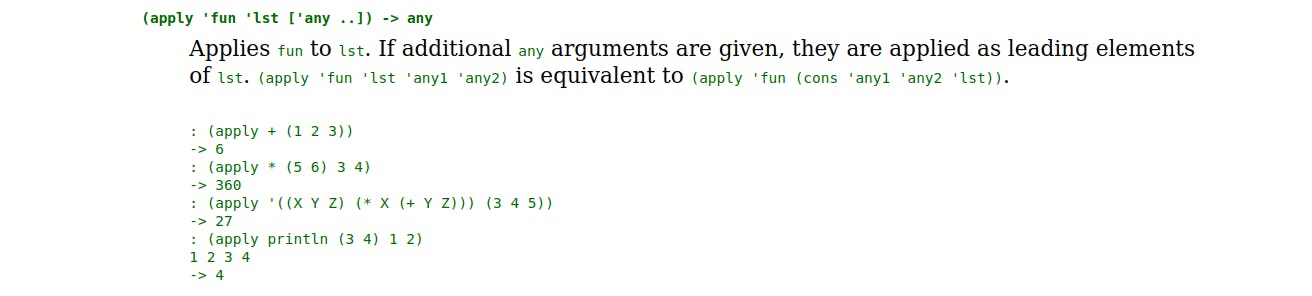
(apply 'fun 'lst ['any ..]) -> any
We see the arguments 'fun and 'lst. Both of them are evaluated.
- As you might guess,
funstands for function. A function is recognized by its function name, or it can be anonymous (see the post "Defining own functions" for details). lststands for "list".['any]is set in brackets. This means that it is optional.
What happens if we have any? As described in the text:
If additional
anyarguments are given, they are applied as leading elements of lst.
"Leading elements" is the key here. It means that these are passed to the function first. The third example from the documentation is helpful to understand what that means:
: (apply println (3 4) 1 2)
1 2 3 4
-> 4
Generally, I recommend to have a look at the examples if something is not clear. Copy the whole line and play with it in the REPL. A creative "trial-and-error" study is often more helpful than reading page after page in the docs.
Access the documentation from the REPL
As already mentioned, it is not needed to have a webbrowser open. Sometimes it can be more convenient to open the docs directly from the REPL window. For that purpose, the text-based browser W3M is used. If it is not installed on your system, install it first:
$ sudo apt-get install w3m
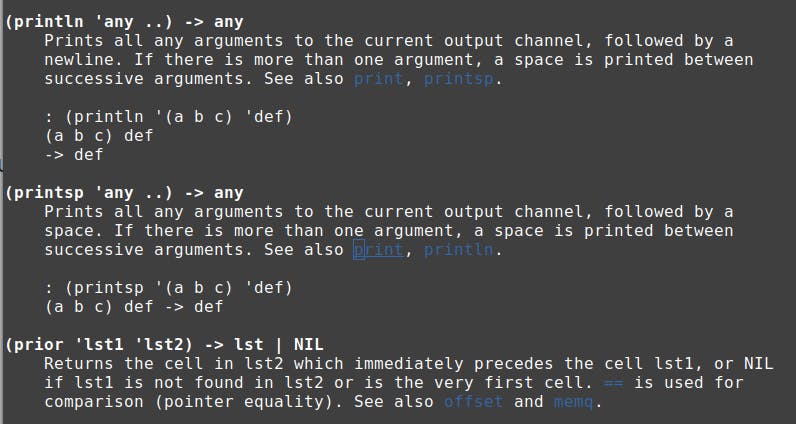
After that, you can access any documentation entry by typing (doc 'fun) in the REPL. Example:
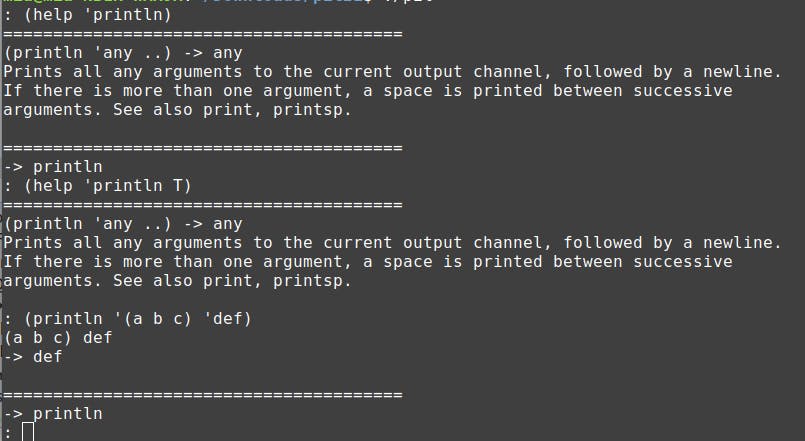
: (doc 'println)
shows a text window with the documentation:
You can jump around with tab and the arrow keys -> <-, and exit with q. For further shortcuts, refer to the w3m documentation.
The help function
If you don't want to access the whole documentation, you can also call the help function from the REPL. (help 'fun) displays the syntax and description directly in the REPL. (help 'fun T) shows also the examples.
To the core: Read the source code
There might be cases when you don't want to read the documentation, but the source code of a function. For example, if you want to understand what is happening on a low level, or if you are looking for inspiration for your own function...
For this purpose, the REPL allows to access to directly read the source code. Currently, pil21 only supports viewing the source code with a vim-subset called vip.
Opening the source code
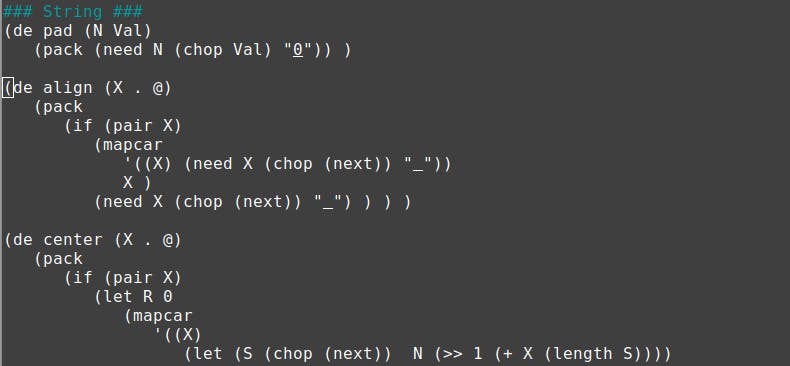
To read the source code of a file, type (vi 'fun). As an example, let's take a look at the source code of the align function:
: (vi 'align)
The vip editor opens in the terminal window and we can read the sources:
Some basic vip commands
The vip has a quite extensive number of features that can be viewed here. In general, the vip-editor commands are very close to the "standard" vim - if you haven't used vim before, consider to take a look at the vim basics first.
Navigation
i: change to insert mode <->ESC: change to normal modehleft (command mode)lright (command mode)jdown (command mode)kup (command mode):qleave:w <filename>save to file:xsave and quit
Jumping within the documentation
One very handy feature is that you can jump within the navigation menu. For example, if we want to inspect the pack function which is in the first line of our align source code, we can navigate to the word "pack" (using h, j, k, l for navigation) by typing Shift-K (or Ctrl-], like in "standard" vim).
Shift-KorCtrl-]-> jumping to next reference,Shift-QorCtrl-T-> back to previous reference.

In-Memory Editing
Obviously, the source code function itself shouldn't be modified unless you totally know what you are doing. However there is the possibility to edit one or more sourcefiles in memory by accessing it by (vi '(fun1 fun2 fun3)) - note the parentheses around the function name - or in short form (v fun1 fun2 fun3).
: (v align uniq) # this is equal to (vi '(align uniq))
The sourcecode of both functions is opened in a temporary vip-file that can be saved to disk by :w <myfilename>, without any danger to overwrite something critical.

Remark: Older versions of PicoLisp (before pil21) don't have the vip-editor but support viewing the source code in vi and emacs. Type (vi 'fun) for vi and (em 'fun) for emacs to see the source code. You need to have either vim or emacs installed.
In the next post, we will show how to use the PicoLisp debugger.
Sources
Bild von Ag Ku auf Pixabay
software-lab.de/doc/index.html
picolisp.com/wiki/?vip